
Published February 25, 2026
Scanning Old Photos for Mom: A DIY Guide to Preserving Her Memories
In your mom’s house, there’s a treasure chest. It might not look like one—it could be a dusty shoebox in the back of a closet, a stack of heavy, vinyl-paged albums on a bookshelf, or a forgotten biscuit tin in the attic. Inside, however, lies gold: a lifetime of memories captured on fading photo paper. There’s Mom in her wedding dress, you as a gap-toothed kid on a tricycle, and a photo of grandparents you never had the chance to meet. These images are priceless, but they are also fragile. They are fading, yellowing, and at risk of being lost forever.
You’ve decided to do something about it. You’re going to digitize them. This project is more than just a technical task; it's an act of love, a way to safeguard your family’s legacy for generations to come. But where do you even begin? The thought of tackling hundreds, maybe thousands, of photos can be overwhelming. Fear not. This is your complete DIY guide to turning that mountain of memories into a beautifully organized digital archive. Let’s get scanning.
Part 1: The Prep Work - Staging Your Project for Success
Before you scan a single photo, a little preparation will save you hours of frustration down the line. Think of this as the 'mise en place' for your memory-saving mission. A well-organized project is a successful project.
Gather and Sort Your Collection
First, gather all the photos from their various hiding spots around the house. Bring them all to one central location, like a large, clean dining table. Now, the sorting begins. This is often the most emotional and rewarding part of the process, so give yourself time to enjoy it. Sit down with a cup of tea (kept at a safe distance from the photos!) and go through them.
Create a few piles to make the task manageable:
- The A-List: These are the absolute must-scans. The wedding photos, the baby pictures, the irreplaceable family portraits. These are your top priority.
- The B-List: These are the photos that are nice to have. The blurry vacation shots, the duplicates, the landscapes without people. You’ll get to these if you have time.
- The Outtakes: Be ruthless. Every collection has photos that don’t need to be preserved—blurry shots of the ground, photos where everyone’s eyes are closed, or the tenth picture of the same flower pot. It’s okay to let these go.
As you sort, try to group photos by event or year. You can use sticky notes (place them on the back or on a piece of paper separating the stacks) to label groups like "Mom & Dad's Wedding 1978" or "Family Vacation 1995." This will be a lifesaver when you’re naming digital files later.
Clean Your Photos (Gently!)
Decades of storage mean dust, fingerprints, and grime. You want the best possible scan, so a quick, gentle cleaning is in order. Do not use water or cleaning solutions! Photo emulsions are delicate and can be easily damaged. Instead, use a soft, clean microfiber cloth to gently wipe the surface of each photo. For stubborn dust, especially in corners, a can of compressed air (used in short bursts from a distance) works wonders.
Part 2: The Main Event - Choosing Your Scanning Method
With your photos prepped and ready, it’s time to choose your weapon. There are three main DIY methods for scanning photos, each with its own set of pros and cons.
Method 1: The Flatbed Scanner
This is the traditionalist’s choice. A good flatbed scanner, often part of an all-in-one printer, can produce incredibly high-quality digital images. It gives you maximum control over the final result.
- Pros: Excellent image quality and resolution. Great for handling fragile or curled photos as they lie flat. You can control settings like DPI (dots per inch).
- Cons: It’s slow. Very slow. You can typically only scan one to four photos at a time, and the process of previewing, scanning, and saving each batch is time-consuming.
- DIY Tip: For resolution, a good rule of thumb is 300 DPI for viewing on screens and 600 DPI or higher if you ever plan to print enlargements. Before you start, make sure the scanner glass is perfectly clean to avoid scanning dust spots onto every image.
Method 2: The Dedicated Photo Scanner
If you have a massive collection and a bit of a budget, a dedicated photo scanner might be a worthwhile investment. These devices are built for one purpose: scanning photos quickly.
- Pros: Speed. Many models have auto-feeders that can process a stack of photos in minutes, not hours. They often come with software that helps with color correction and organization.
- Cons: They can be expensive for a one-off project. The auto-feed mechanism might not be suitable for very old, thick, or fragile photos (like Polaroids or torn prints).
- DIY Tip: If the cost is prohibitive, check if you can rent one from a local camera shop or library. Always test with a few non-essential photos first to ensure the feeder doesn’t cause any damage.
Method 3: Your Smartphone – The Modern DIY Hero
Don’t underestimate the power you hold in your hand. Modern smartphone cameras are incredibly capable, and when paired with the right app, they can be the fastest and most convenient scanning tool of all.
- Pros: You already own it. It’s incredibly fast, portable, and allows you to scan photos anywhere, anytime. You can even scan photos directly from an album without removing them.
- Cons: Without the right technique, you can get glare, shadows, and distorted angles. The quality is highly dependent on your phone’s camera, your lighting, and the app you use.
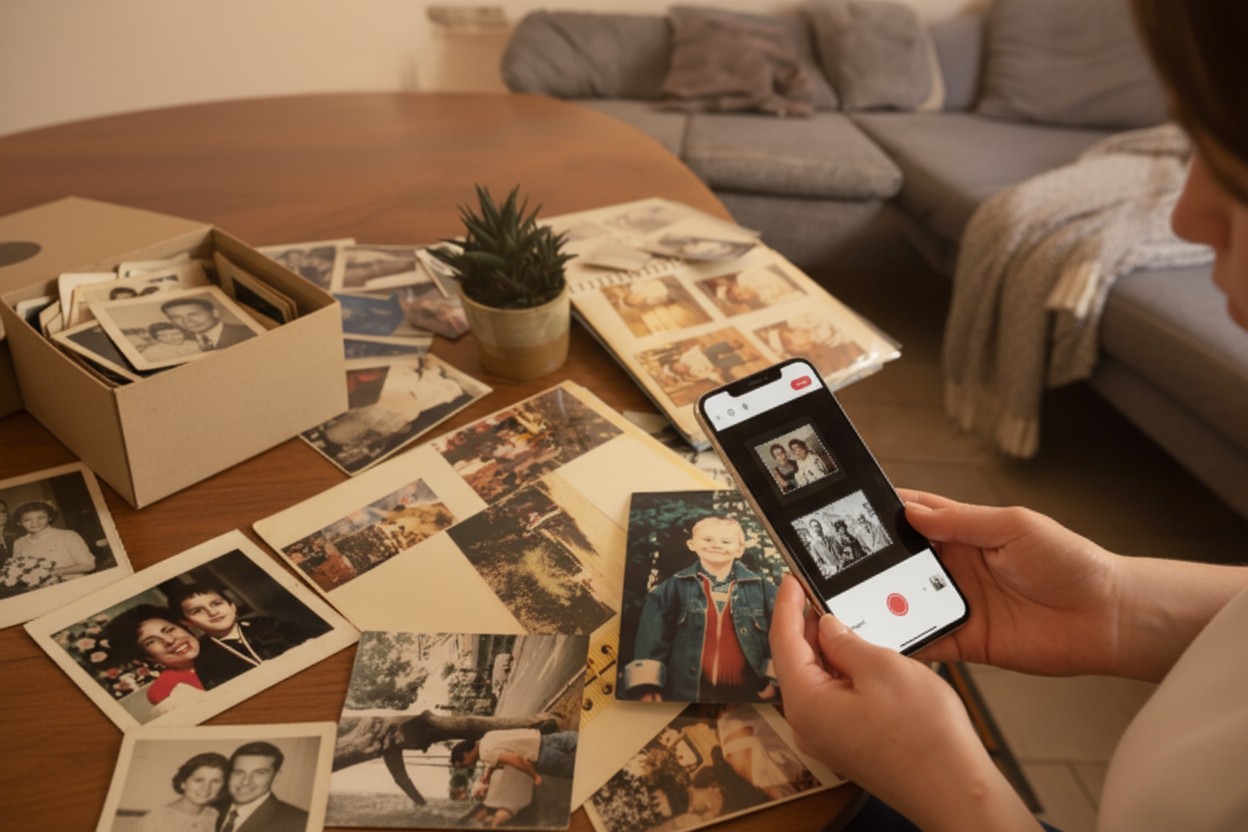
- DIY Tip: This is where a specialized app becomes essential. Simply taking a picture of a picture often yields poor results. For instance, an app like Photomyne is designed specifically for this task. It uses clever technology to scan multiple photos in a single shot, automatically detecting the boundaries, cropping them, and correcting the perspective. It’s a game-changer that turns a tedious task into a quick, satisfying process. You could sit with your mom on the sofa, flip through an album, and digitize an entire chapter of her life in minutes, capturing the stories as you go. The best tools are often the ones that make the experience itself a memory.
Part 3: The Aftermath - Organizing, Backing Up, and Sharing
Congratulations, the scanning is done! But your work isn’t quite finished. What you do next ensures these digital memories will be safe and accessible for years to come.
Stay Organized During Your Scanning Project
When working on a scanning project, organization is just as important as the scanning itself. Without a clear system, even beautifully scanned photos can quickly become difficult to find or enjoy.
If you’re saving your scans in an app or to the cloud, make sure to organize them properly within the platform. Create albums and add meaningful descriptions, dates, and names to both albums and individual photos. For example, apps like Photomyne store your photos securely in the cloud (via Amazon Web Services) and offer built-in tools for adding dates, titles, and annotations. Taking a few extra moments to tag and describe your photos will make them searchable and much easier to revisit later.
If you’re storing your scans locally on your computer or an external hard drive, the same principle applies. Avoid saving everything in one generic folder like “Scans.” Instead, build a logical folder structure—such as Year > Event (for example, 1985 > Christmas at Grandma’s).
Just as importantly, rename your files. A filename like IMG_2056.jpg doesn’t tell you anything. Use descriptive filenames that include dates and context. A helpful format is YYYY-MM-DD_Event_Description_001.jpg (for example, 1985-12-25_Christmas_MomOpeningPresents_001.jpg). It may feel tedious at first, but future you will be grateful when searching for a specific memory.
Good organization ensures your scanning project stays meaningful, accessible, and easy to share for years to come.
Back It Up, Then Back It Up Again
A digital file is only as safe as its copies. A hard drive can fail. A cloud service can change. The gold standard for digital preservation is the 3-2-1 Rule:
- 3 Copies: Keep at least three copies of your photo library.
- 2 Different Media: Store them on at least two different types of storage (for example, your computer’s hard drive and an external hard drive).
- 1 Off-site Location: Keep one copy somewhere else (such as a secure cloud storage service or a hard drive at a relative’s house).
If you’re scanning with the Photomyne app, your photos are automatically backed up to secure Amazon Web Services (AWS) cloud storage. This means your scans are not just saved on your device, but protected in a secure, off-site cloud environment as well — giving you an important layer of protection right from the start.
When choosing any cloud service, look for one with a strong commitment to privacy and security. Mom’s memories are personal, and ensuring they are stored with robust encryption and a policy that respects your ownership is just as important as protecting the physical prints.
Share the Love
This is the final, most joyful step. You’ve preserved these memories—now share them!
- Buy Mom a digital photo frame and preload it with all the scanned photos.
- Create a beautiful hardcover photo book as a birthday or Mother’s Day gift.
- Make a slideshow set to her favorite music for the next family gathering.
- Create a private, shared online album for the whole family to enjoy and contribute to.
This project, born from a shoebox of old photos, is one of the most meaningful gifts you can give. It’s a bridge to the past, a comfort in the present, and a legacy for the future. You’re not just scanning photos; you’re honoring a life, a family, and the beautiful, fleeting moments that define us. Happy scanning!