
Get your phone mount ready for smoother scanning with step-by-step setup instructions, proper positioning tips, and a steadier hands-free scanning experience.
Watch: How to Set Up Your Phone Mount
Follow along with our quick video tutorial to see how to assemble and position your phone mount for hands-free scanning.
Step-by-Step Setup Instructions
-
Choose your setup spot
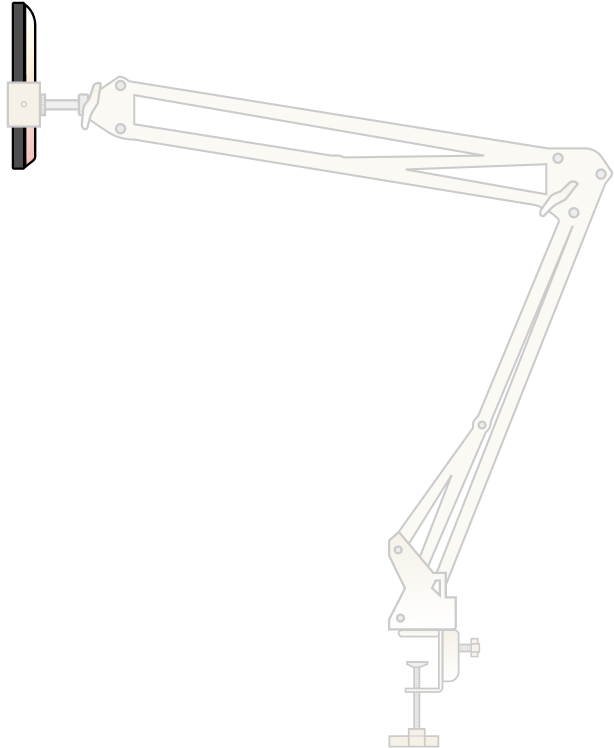
Pick a well-lit area and a sturdy surface for scanning.
-
Assemble the phone mount
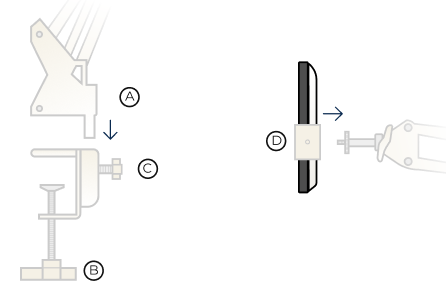
- a – Insert the black end of the adjustable arm (A) into the surface clamp (B).
- b – Fasten the clamp securely to your scanning surface.
- c – Secure the arm to the clamp using the flower knob (C).
- d – Tighten the knob until the arm is stable.
- e – Screw the phone holder (D) tightly into the silver end of the arm.
- f – Choose one of the two orientations (as shown in your guide).
-
Insert your phone
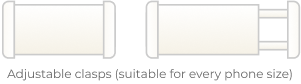
Pull and slide the phone holder clasps apart, then secure your phone between them.
-
Prepare your scanning materials
Place your photos, album, slides, or negatives on the surface.
- You can scan a full album page or multiple loose photos at once.
- For slides and negatives, place them parallel to a light source (for example, a Photomyne light pad).
-
Position the mount and start scanning
Adjust the arm so your phone is directly above and parallel to the items, then scan using the Photomyne app.